Manual Flange Spreader Paddles are one of the most under-utilised, maligned and badly made tool of all the subsea flange tie in aids.
For those that are well aquainted with mechanical flange tie ins – flange faces can often end up not parallel to each other, developing what is known in the diving trade as a ‘cheese’.
To assist in squaring up the flanges a set of flange spreader paddles are installed on the barrow side of the ‘cheese’ to prevent /restrict the narrow side from closing early, while a bolt tensioning jack or several are used to square up the flanges.
Once the flanges are square, the flange spreader paddle is eased off slowly to allow the flanges to come together and ‘capture’ the gasket and reduce or mitigate the possibility any damage to that gasket.
AutoCAD drawing - Example 18” 1500# (class) Flange Spreader Paddles
Fabrication Instructions
Decide on Flange Size & Class – Example In this case is an 18” 1500# flange.
Make an AutoCAD Drawing of Flange Face with Flange Spreader Paddle Dimensions
Decide on Plate Thickness for Flange Size e.g. 12mm plate for 18” flange spreader paddles.
Using AutoCAD Drawing as a pattern – cut paddles from 12mm plate.
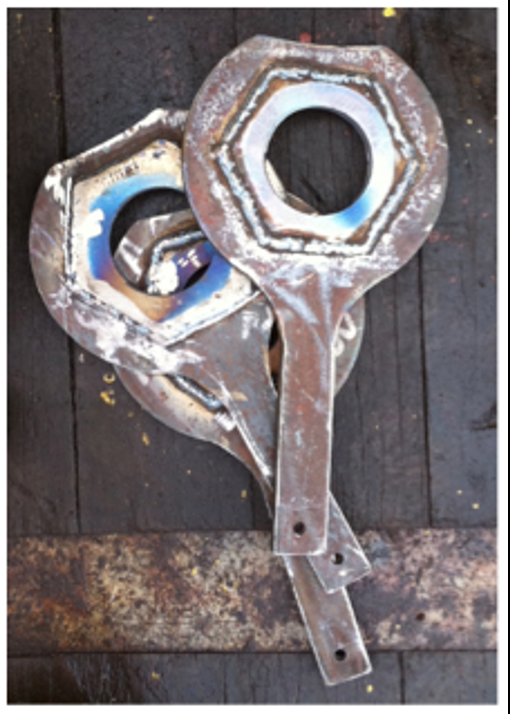
Weld full nuts to each end – see photos.
Use drop saw or 5” grinder to cut nuts to 14mm thickness.
Cut centre of ‘male’ paddle to accept 14mm nut ‘sliver’.
Prep for full penetration welding & weld 14mm nuts into ‘female’ paddle.
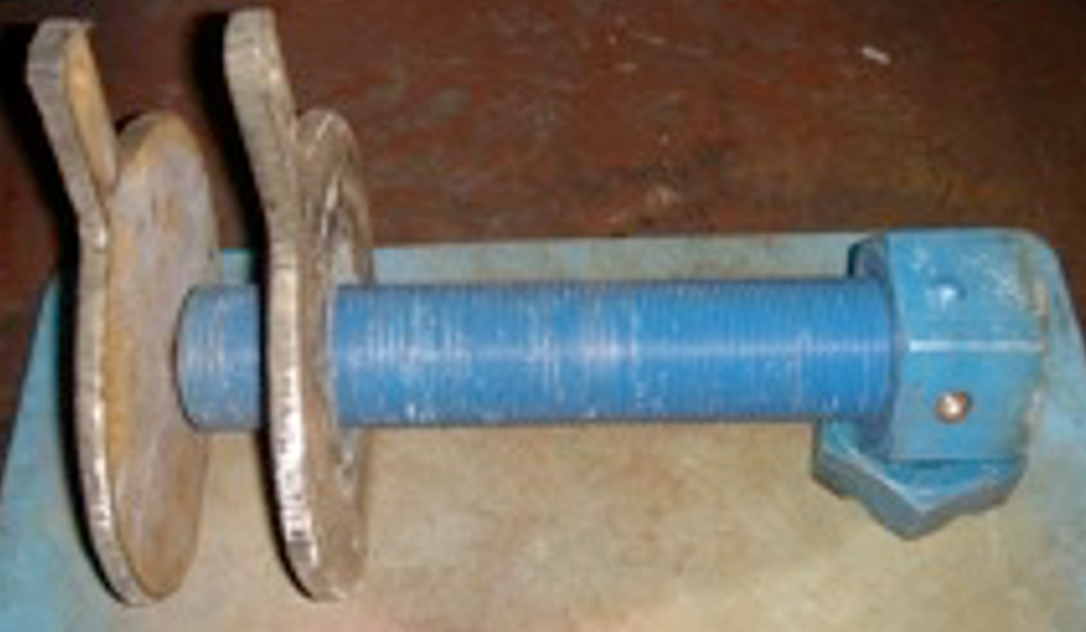
Cut a B7 flange studbolt in half & slightly taper one end – see photos.
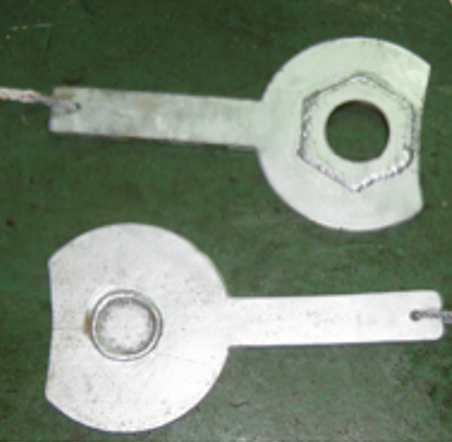
Mechanical Flange Spreader Paddles – 1 set, without the bolt. Top paddle is the ‘female’ side with the trimmed down threader nut and the bottom paddle is the ‘male’ or receiving paddle that the bolt will push against to hold the flanges apart at that particular location.
Flange Spreader Paddles
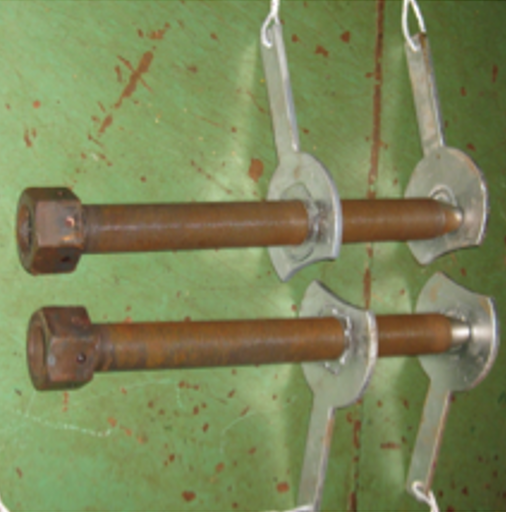
Completed 2 sets of Mechanical Flange Spreader Paddles – bolts have a taper to help locate the bolt into the ‘male’ paddle and welded nuts to be able to ‘drive’ the bolt into the ‘male’ paddle by using a flogging spanner or an impact wrench.